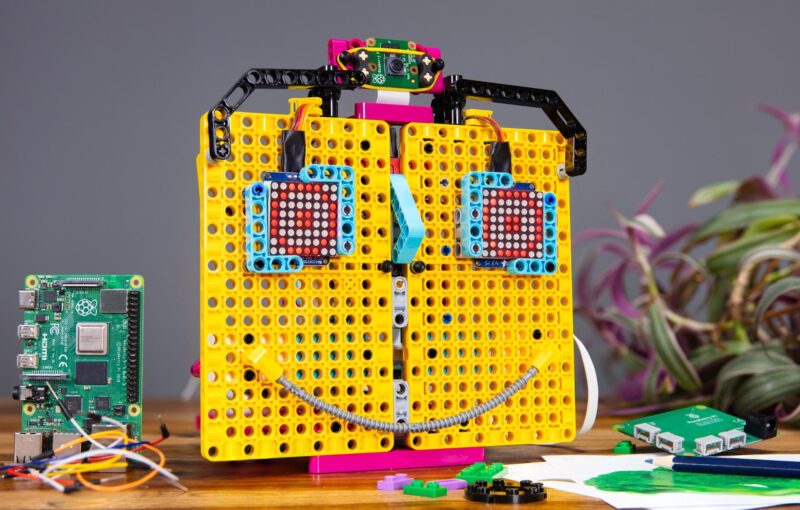
Raspberry Pi has announced the Raspberry Pi Build HAT, making it easy to integrate LEGO Technic motors and sensors with Raspberry Pi computers.
“We’ve designed it to enable fun and creative learning experiences for young people, teachers, and makers.”

Raspberry Pi Build HAT
The Build HAT is part of a new collaboration between Raspberry Pi and LEGO Education to increase the impact and reach of STEAM learning. We’re really thrilled about the possibilities this new team-up will bring, as is the LEGO Education team.
“We are excited to work with Raspberry Pi to provide tools for students, teachers and makers all over the world to expand their creative digital skills and discover hands-on learning experiences,” said Andrew Sliwinski, Head of Product Experience, LEGO Education.

Raspberry Pi meets LEGO Education
The Build HAT, priced at $25, is a new add-on board for your Raspberry Pi. It connects to the 40-pin GPIO header and can be used to control up to four LEGO Technic motors and sensors from the LEGO Education SPIKE Portfolio.
The HAT works with all 40-pin GPIO Raspberry Pi boards, including Raspberry Pi 4 and Raspberry Pi Zero. With the addition of a ribbon cable or other extension device, you can also use it with Raspberry Pi 400.


The design of the Build HAT means that all the components are on the bottom, leaving room on the top of the board for LEGO Minifigures to hitch a ride, or for a mini breadboard. You can connect the HAT directly to your Raspberry Pi with the attached header, using 9mm spacers to ensure a stable fit, or you can add an extra-tall header to keep the unused GPIO pins accessible. Whichever method you choose, make sure you position the Build HAT the right way round when installing it on your Raspberry Pi!

Like Raspberry Pi Pico, the Raspberry Pi Build HAT uses the RP2040 chip developed right here at Raspberry Pi.
The power of LEGO bricks with Raspberry Pi

If you just want to read from motor encoders and the SPIKE force sensor, you can power your Raspberry Pi and Build HAT the usual way, via your Raspberry Pi’s USB power socket. The SPIKE colour and distance sensors, like the motors, require an external power supply.
LEGO Education SPIKE Prime
The LEGO Technic devices included in the SPIKE Portfolio are perfect for rapidly prototyping your next robotics or physical computing project. The available sensors include a distance sensor, a colour sensor, and an incredibly versatile force sensor. The angular motors, which come in a range of sizes, include integrated encoders you can query in order to find their position. That means you can precisely control your creation’s movement, or use the encoders as input devices in their own right.

You can get LEGO Technic devices as individual items, or together with a collection of really useful stuff in the SPIKE Prime and SPIKE Prime Expansion sets. The latter includes an exclusive LEGO element, the first-ever designed to connect to something that isn’t another piece of LEGO: the Maker Plate. The Maker Plate is designed to make it super easy to add a Raspberry Pi to your LEGO construction. But don’t worry, there are plenty of other creative ways to mount your Raspberry Pi if you don’t have a Maker Plate.

We’ve compiled a list of all the compatible LEGO elements you can use with the Build HAT, so you can check what will work best for your project.