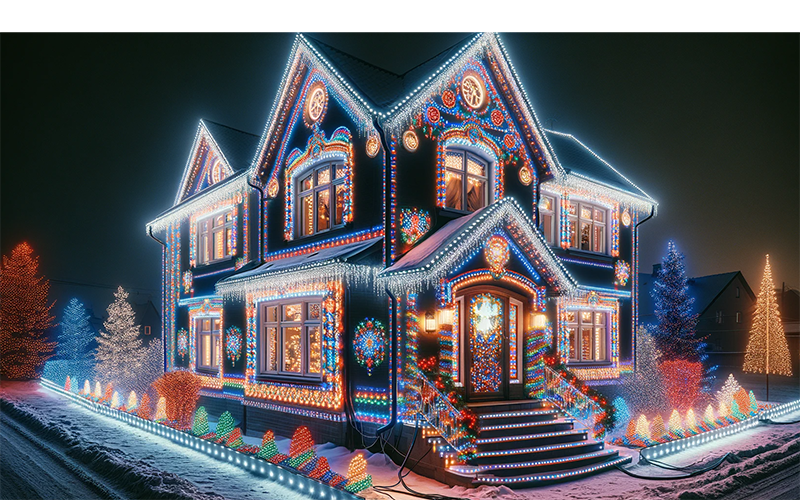
Of all the festive decorations that adorn houses and streets over the Christmas period, it’s the lights, casting a warm glow over chilly winter nights, that make Christmas truly magical.
However, as we become more environmentally conscious, there’s a growing trend towards energy-efficient and technologically advanced lighting solutions.
The evolution of Christmas lights
Christmas lighting has undergone a transformation over the years, from heat-emitting incandescent bulbs to energy-saving LEDs, each iteration marks a fundamental shift in our approach to festive decorations. The current contender taking centre stage is, Organic Light Emitting Diodes (OLEDs). Offering even greater efficiency and versatility, these lights save energy and are also remarkably thin and flexible – allowing for innovative design possibilities.
Advancements in light technology
OLED technology in Christmas lights opens a new chapter in festive lighting as these lights consume less power than traditional LEDs while offering a richer colour palette and greater flexibility in design. Imagine window displays that mimic the soft, natural glow of a winter sunrise, or Christmas trees adorned with lights that curve and contour to the branches.
The world of smart lighting systems is equally fascinating.
Internet of Things (IoT)-enabled Christmas lights can be customised and controlled remotely, offering a seamless integration with other smart home devices; from setting the perfect mood with colour changes to synchronising lights with your favourite Christmas tunes, the possibilities are limitless.
DIY Christmas light projects
For the engineering student, the holiday season is a perfect opportunity to embark on a DIY project.
Objective:
Create a programmable LED Christmas light display that can be customised with different patterns and colours.
Materials Needed:
- LED strip lights: preferably RGB (Red, Green, Blue) LEDs for colour customisation.
- Microcontroller: an Arduino or Raspberry Pi for controlling the LEDs.
- Power supply: suitable for your LED strip (check voltage and current requirements).
- Breadboard and jumper wires: for prototyping the circuit.
- Resistors: to control the current, specific to your LED requirements.
- Software: Arduino IDE or Raspberry Pi OS, depending on your microcontroller.
- Connecting cables: for connecting the microcontroller to the LED strips.
- Soldering Iron and Solder: for making durable connections (if necessary).
- Heat Shrink Tubing or electrical tape: for insulating connections.
- Computer: for programming the microcontroller.
- Optional: light sensors, timers, or additional sensors for more advanced features.
Step-by-Step Guide:
- Planning your design:
- Sketch the layout of your light display, consider where you want to place the lights and how they will be powered.
- Plan the number of LEDs required and how they will connect to the microcontroller.
Setting up the microcontroller:
- Install the Arduino IDE or Raspberry Pi OS on your computer.
- Familiarise yourself with basic programming and setup for your chosen microcontroller.
Testing the LED strip:
- Connect a small section of the LED strip to the power supply and microcontroller to test basic functionality.
- Write a simple program to change colours and turn the LEDs on and off.
Building the circuit:
- Use the breadboard and jumper wires to create the circuit connecting the LED strip with the microcontroller.
- Add resistors if necessary to ensure you’re not overdriving the LEDs.
Programming the microcontroller:
- Write or modify existing code to create desired light patterns and effects.
- Test your code frequently to ensure it works as expected.
Assembling the display:
- Once you are satisfied with the test, replicate the circuit for the entire display.
- Solder connections if necessary for a more permanent setup.
- Ensure all connections are insulated with heat shrink tubing or electrical tape.
Final testing and installation:
- Test the entire setup to ensure all lights and patterns work as expected.
- Securely mount the LED strips in their final location.
- Connect the power supply and microcontroller, and ensure they are protected from the elements if outdoors.
Enjoy your creation:
- Program different patterns and sequences to celebrate the holiday season.
Advanced options (optional):
- Integrate light sensors to turn the display on/off based on ambient light.
- Use timers to schedule light patterns.
- Experiment with IoT connectivity to control lights via a smartphone app.
Safety tips:
- Always disconnect power when assembling or modifying the circuit.
- Ensure all outdoor electrical connections are weatherproof.
- Follow all safety guidelines for using tools and electronic components.
The project is scalable offering the opportunity to add complexity!
Sustainability and eco-friendliness
As future engineers, sustainability should always be at the forefront of innovations, and by reducing energy consumption with LED and OLED lights, it is a step in the right direction. Additionally, responsibly disposing of and recycling old Christmas lights is crucial in minimising environmental footprint.
The future of festive lighting
Looking ahead, the future of Christmas lighting technology is bright and promising. Advancements like augmented reality (AR) enhanced light displays, AI-driven lighting systems that react to environmental factors, or even solar-powered lights that harness renewable energy are on the horizon.
So, this festive season, we encourage you to not only appreciate these advancements but also to get involved. Whether it’s through adopting more sustainable lighting solutions or diving into a DIY project, there’s a myriad of ways to make your holiday season both bright and intellectually rewarding.